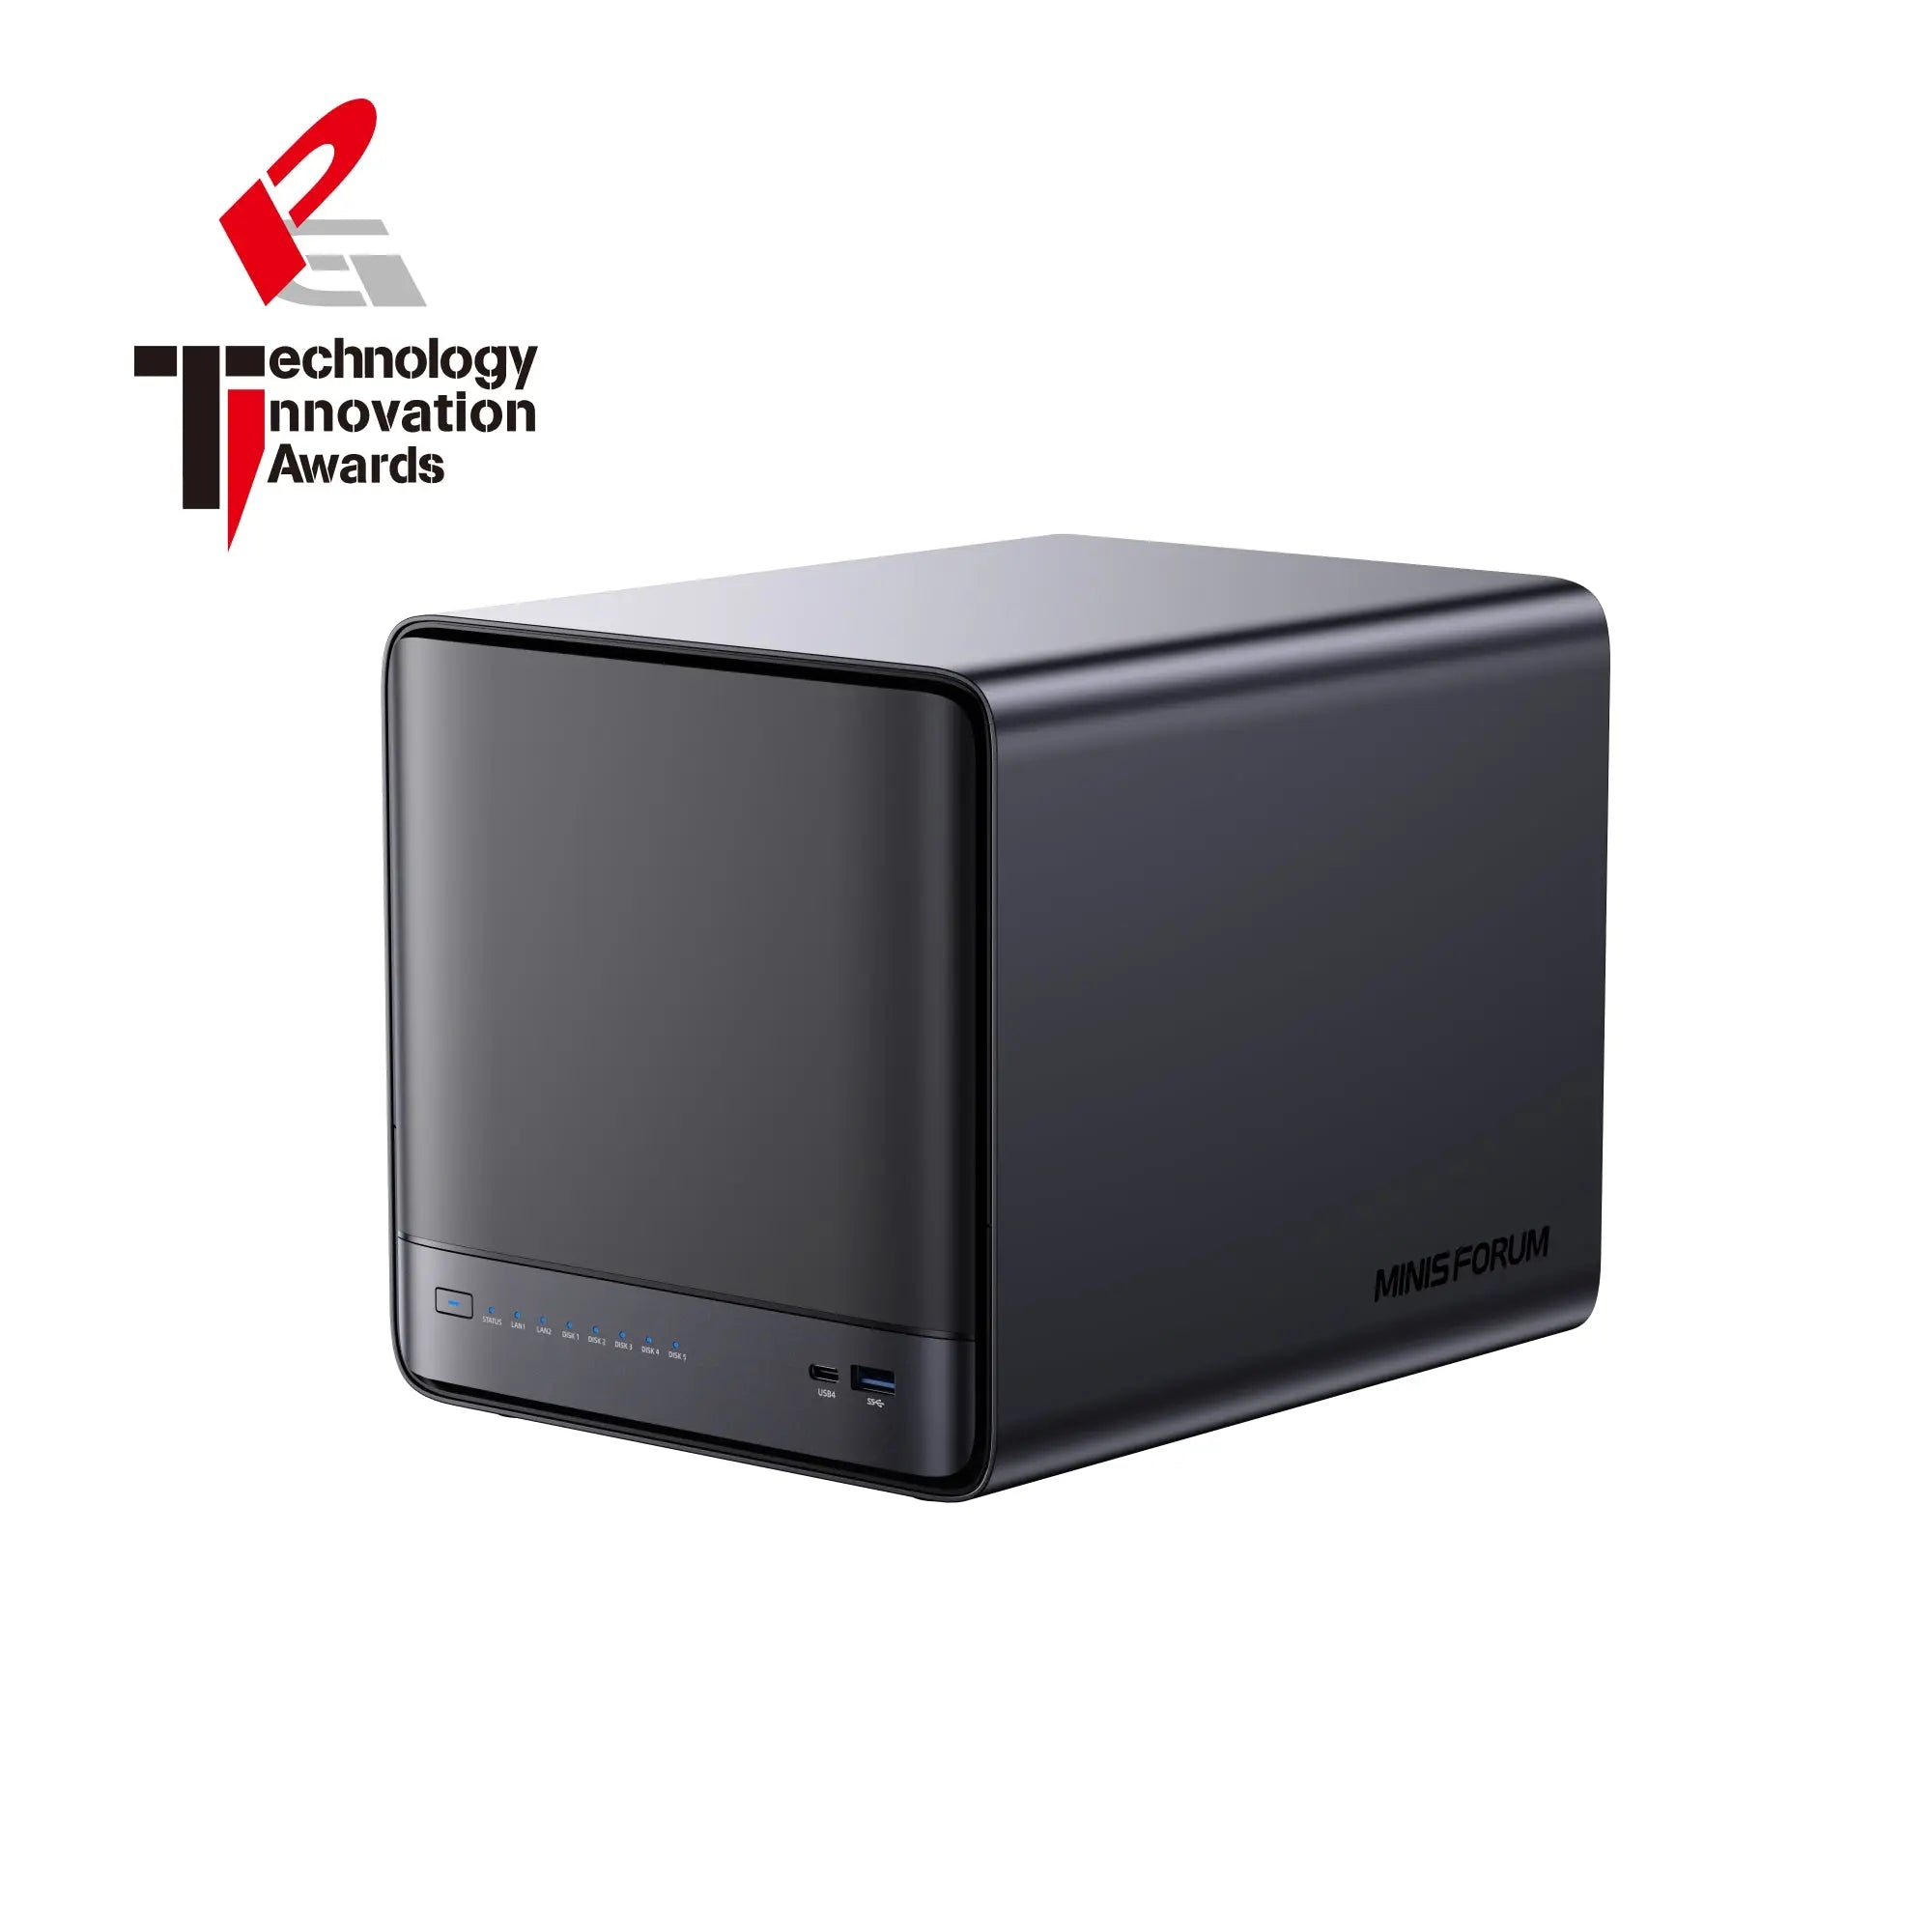
N5/N5 Pro Desktop NAS First Activation Tutorial
For beginners who just purchased the MINISFORUM N5 NAS, or those experiencing startup issues.

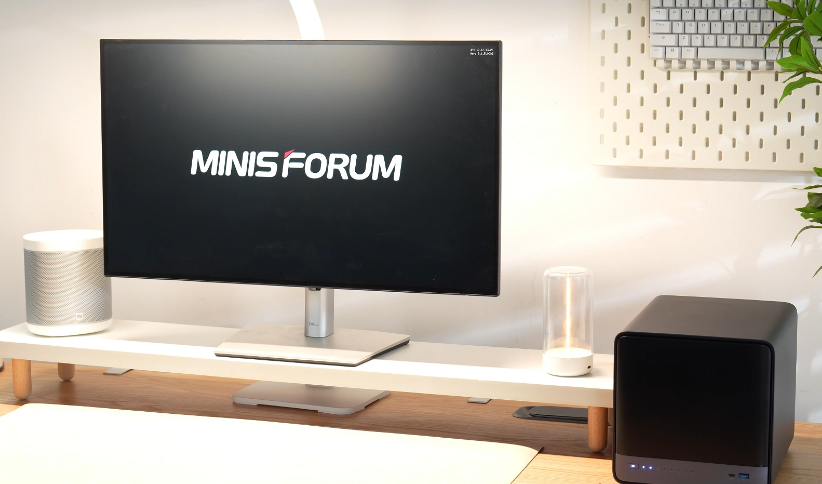
Recently, many users have asked: "When I start the N5 NAS, it stops at the logo screen. Is it malfunctioning?"
Why Does It Stop at the Logo Screen? It’s Normal – Don’t Worry!
First, it’s important to understand: stopping at the logo screen is completely normal.
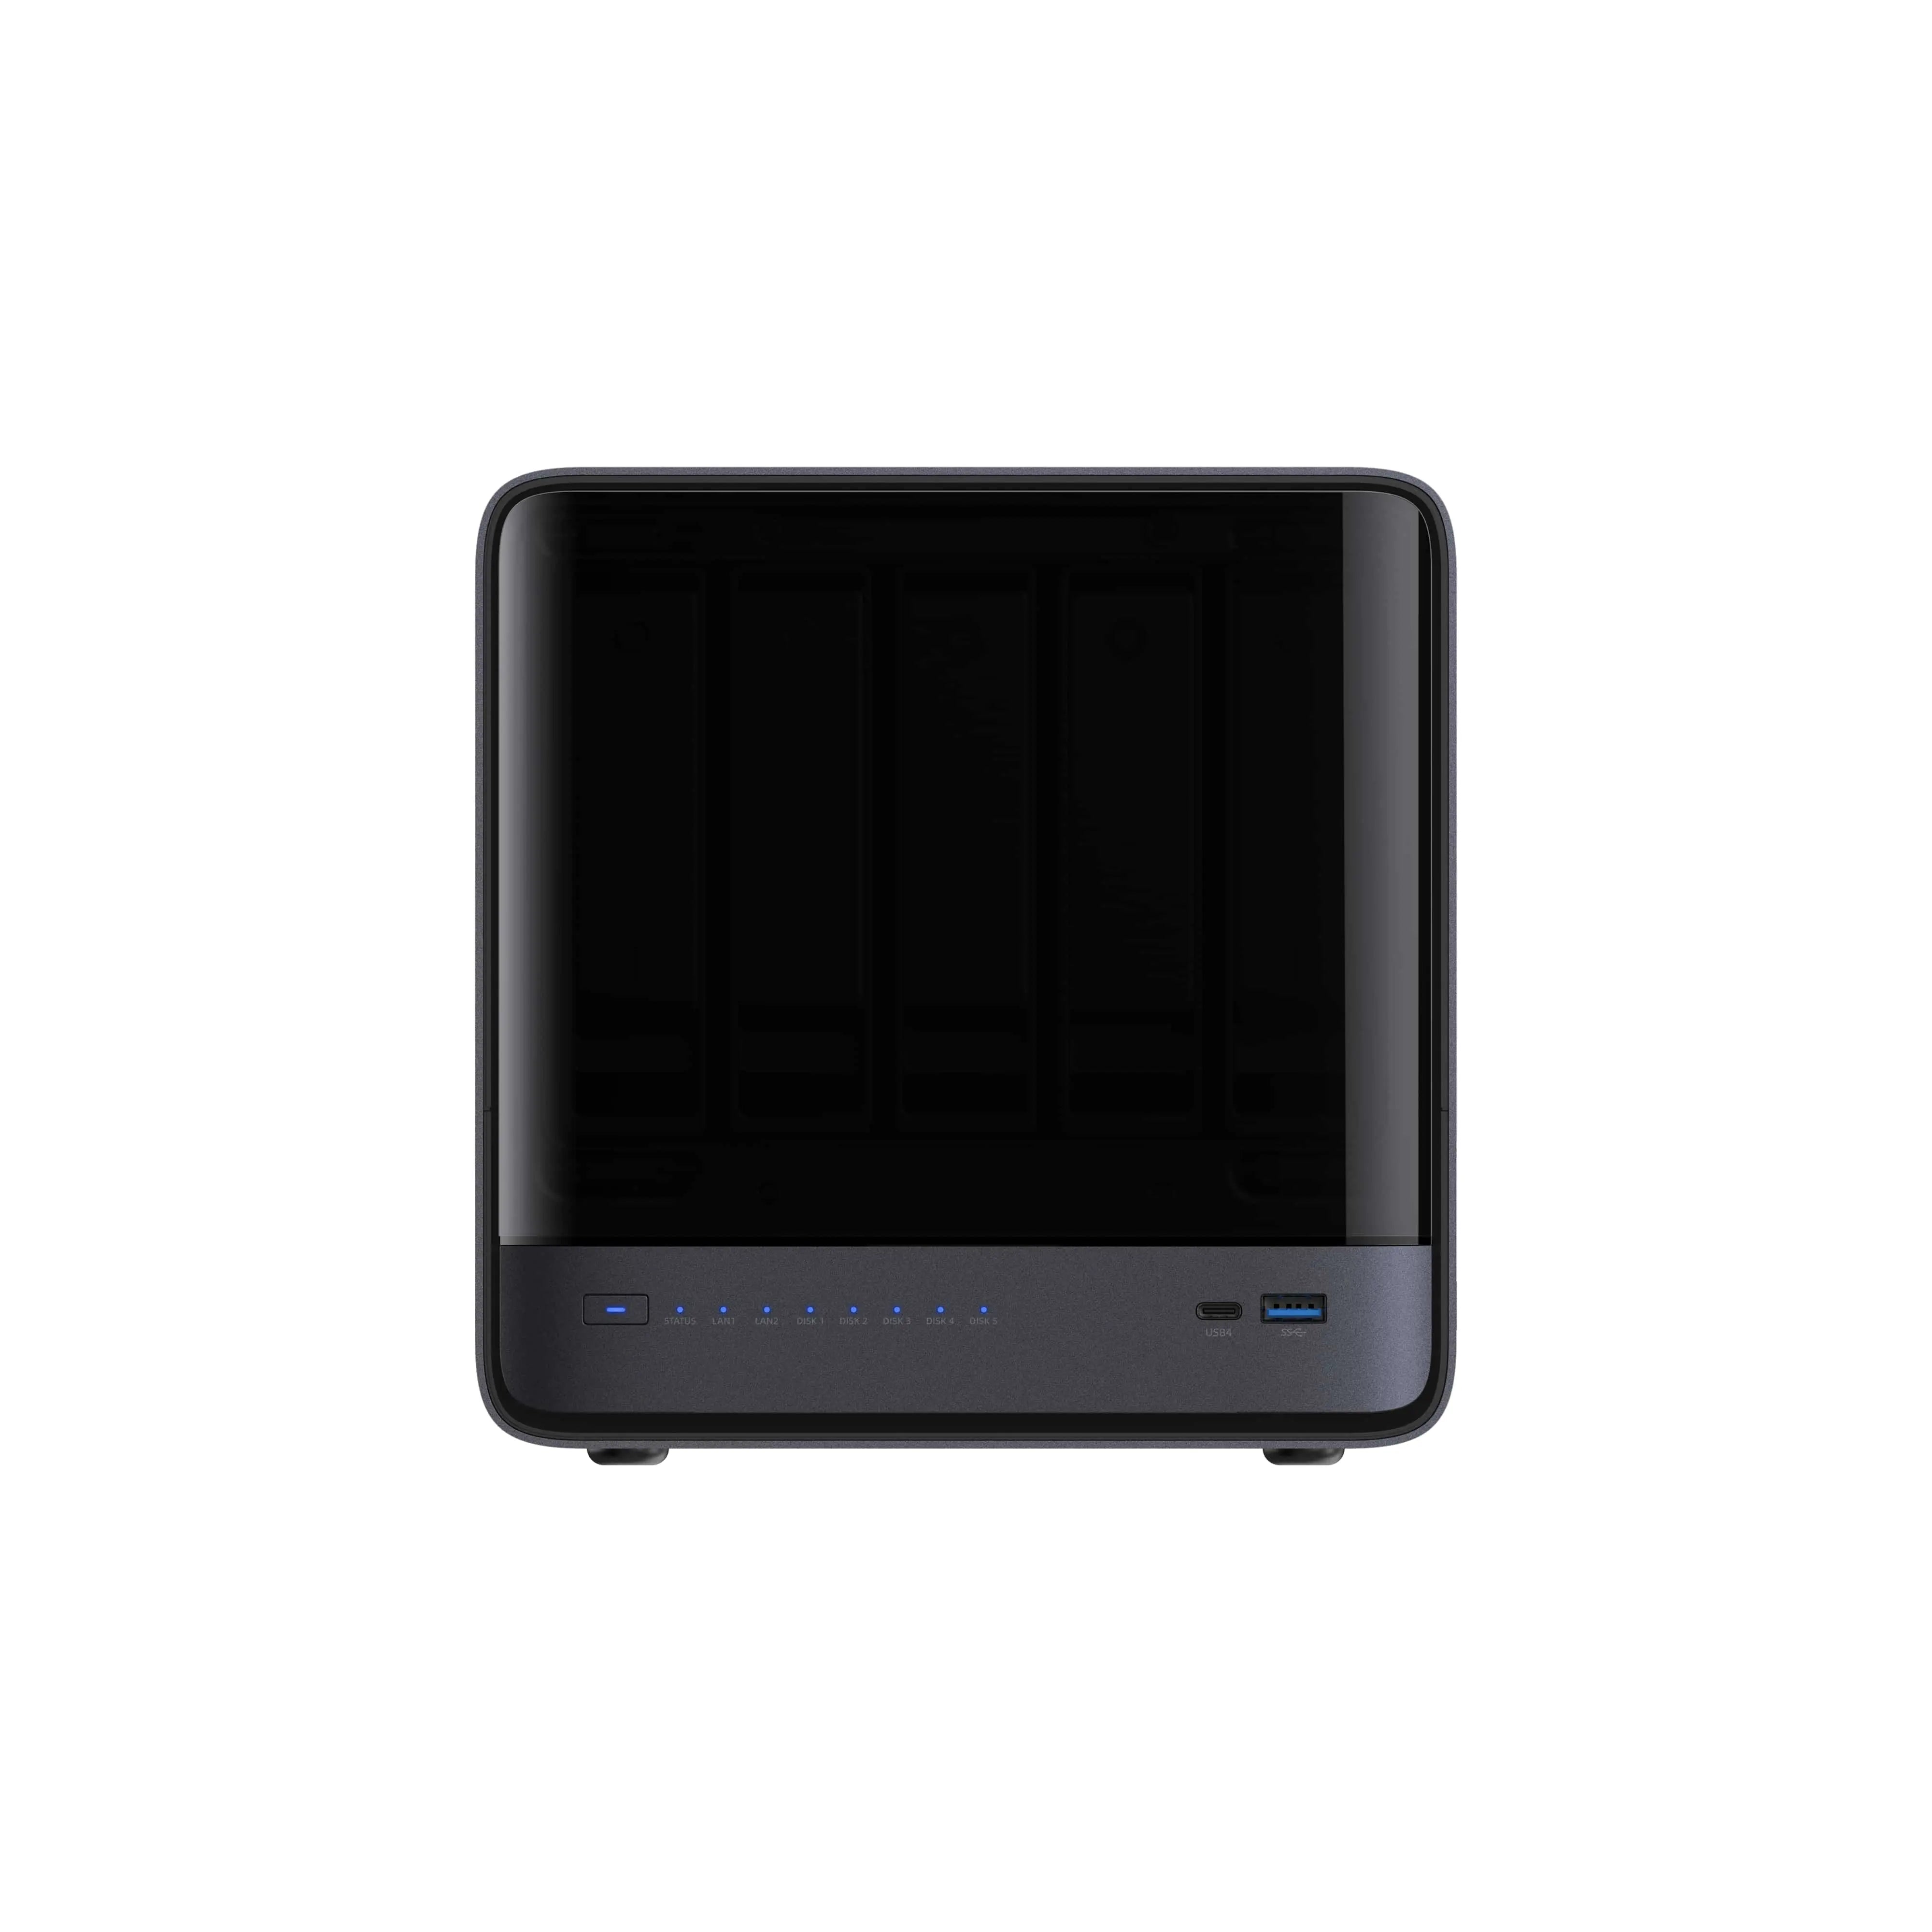
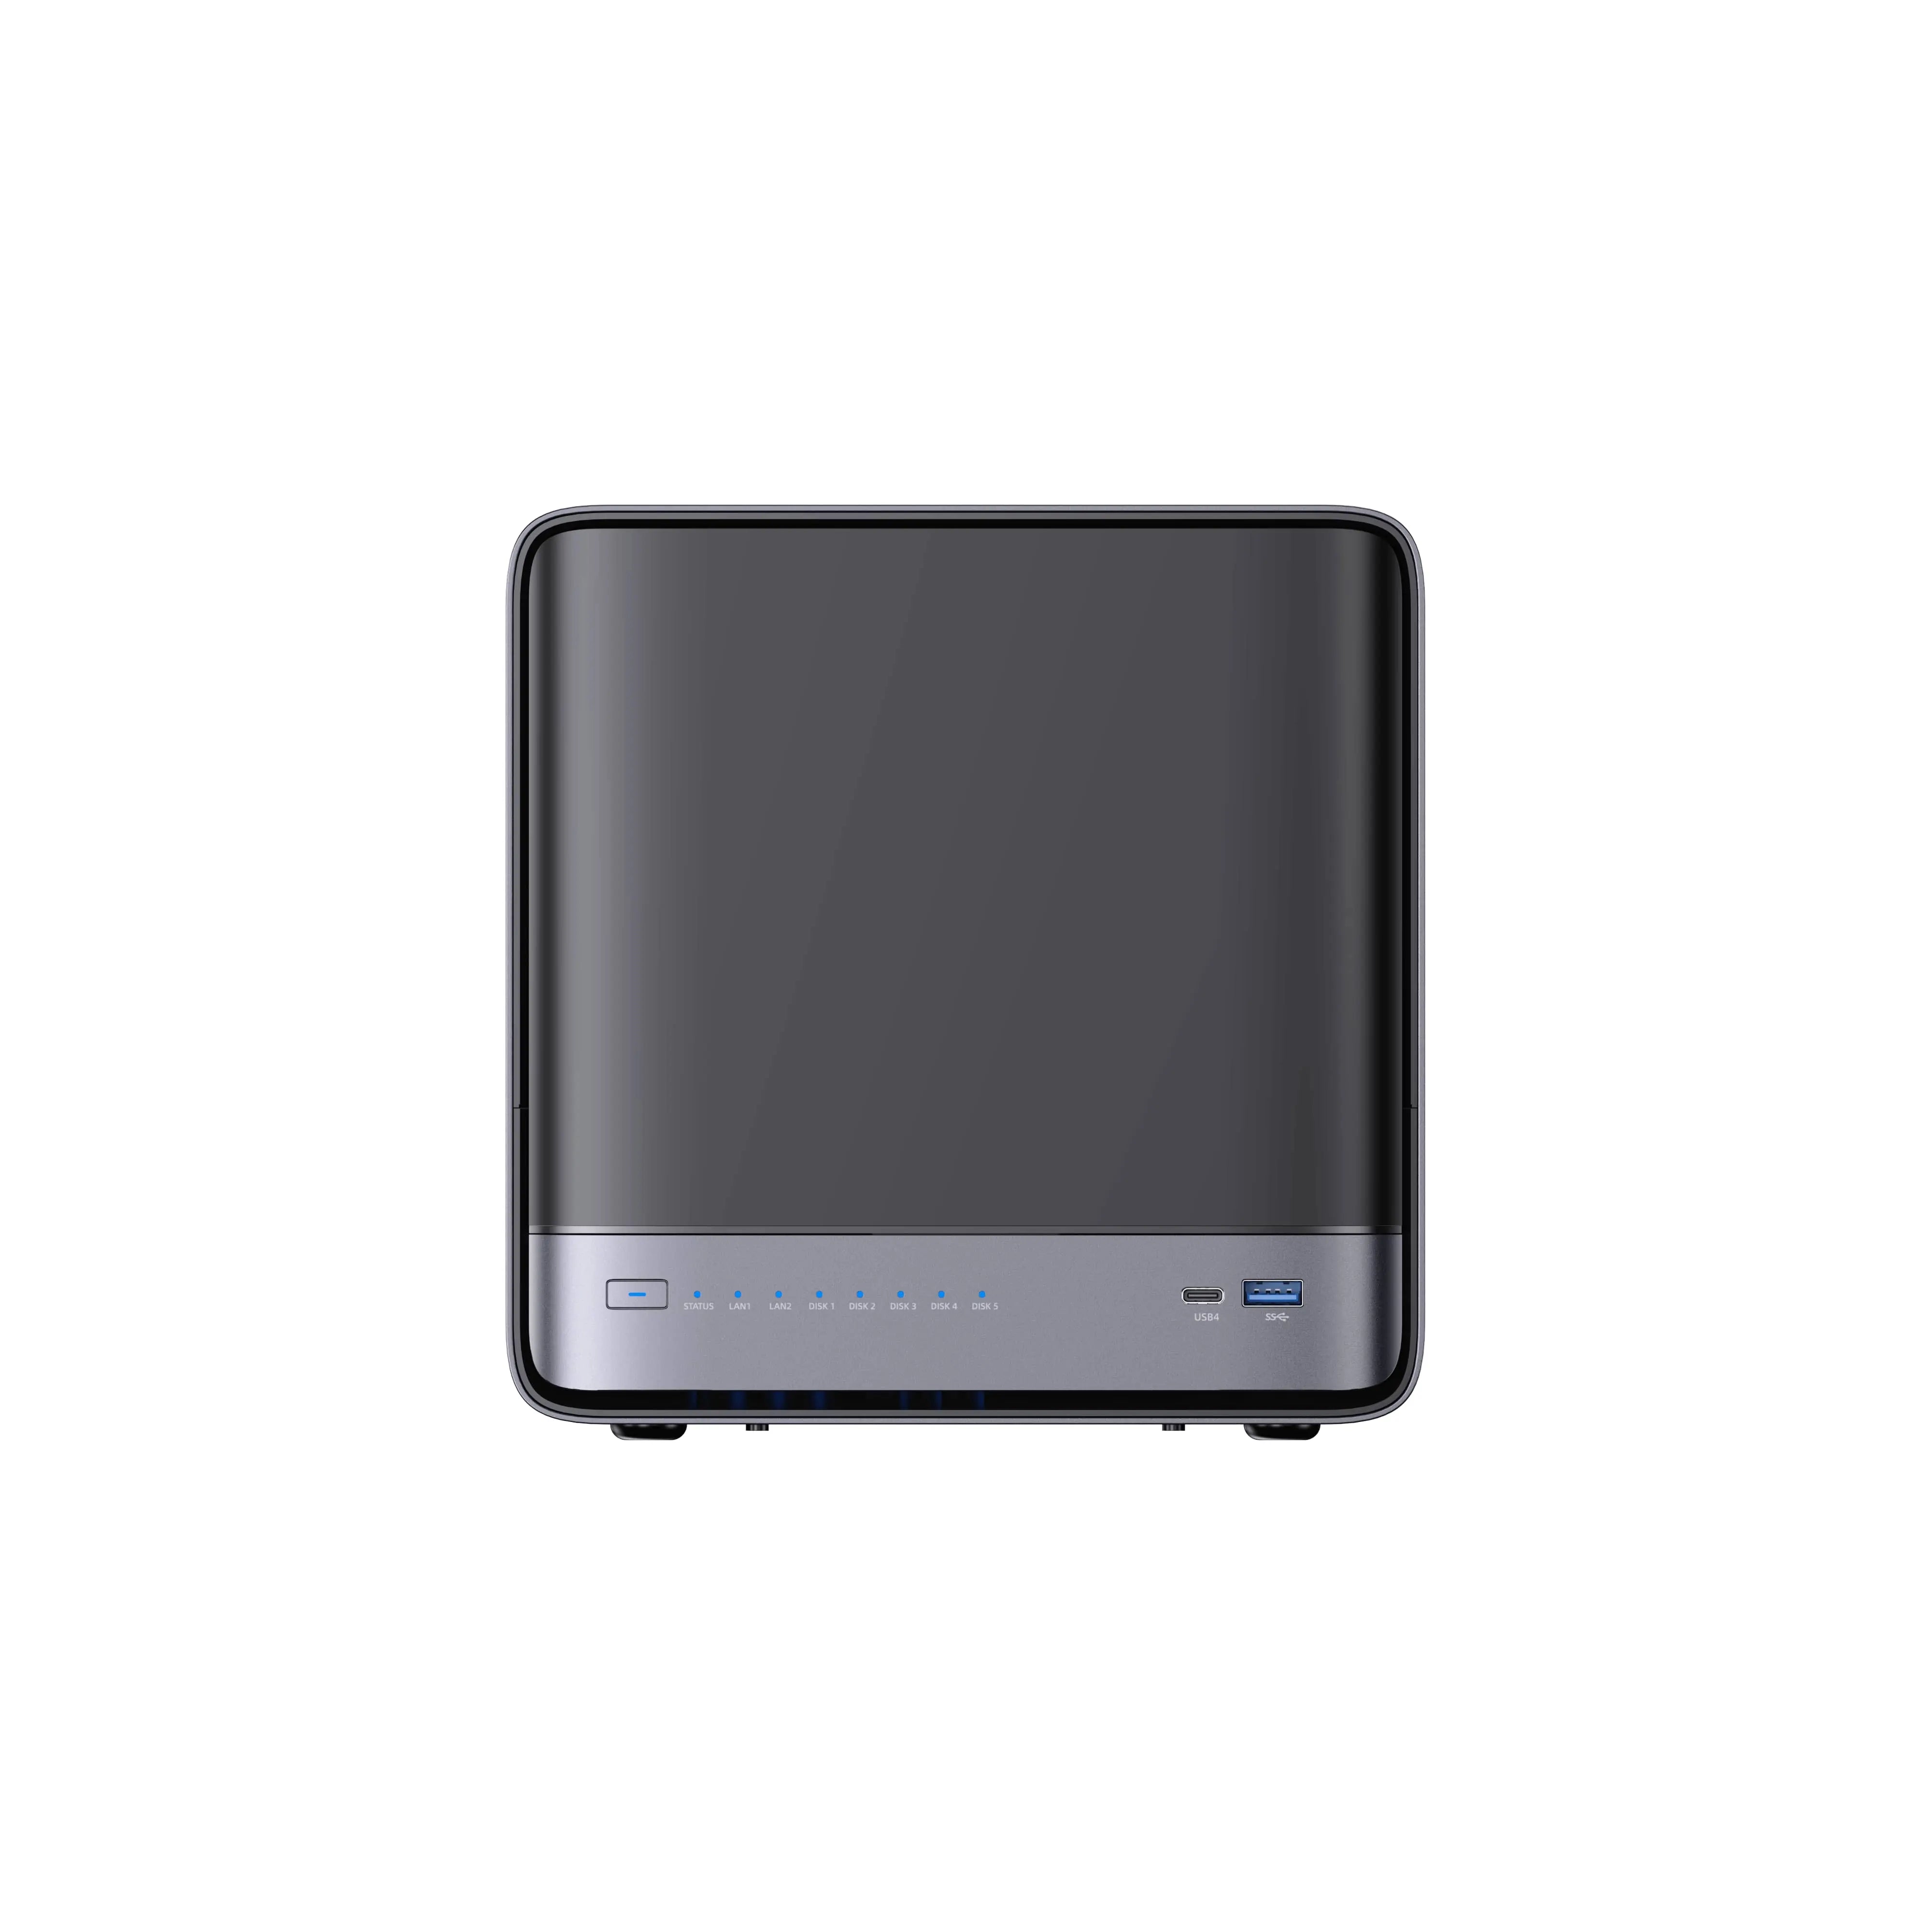
When the N5 NAS starts up, it displays the logo screen and an IP address — this indicates the startup process has completed.

So why does it seem stuck and not proceed further?
Because the system must be activated by linking the device to a user account before it can be accessed.
To activate it, you will need another device (computer or smartphone) to:
- Download the dedicated app
- Add and link the N5 NAS to your account
Once the activation is complete, you can access the system and start using it.
Let’s walk through the complete setup process step by step.
Before we begin the software activation, you’ll first need to install the hardware components and power on the device.
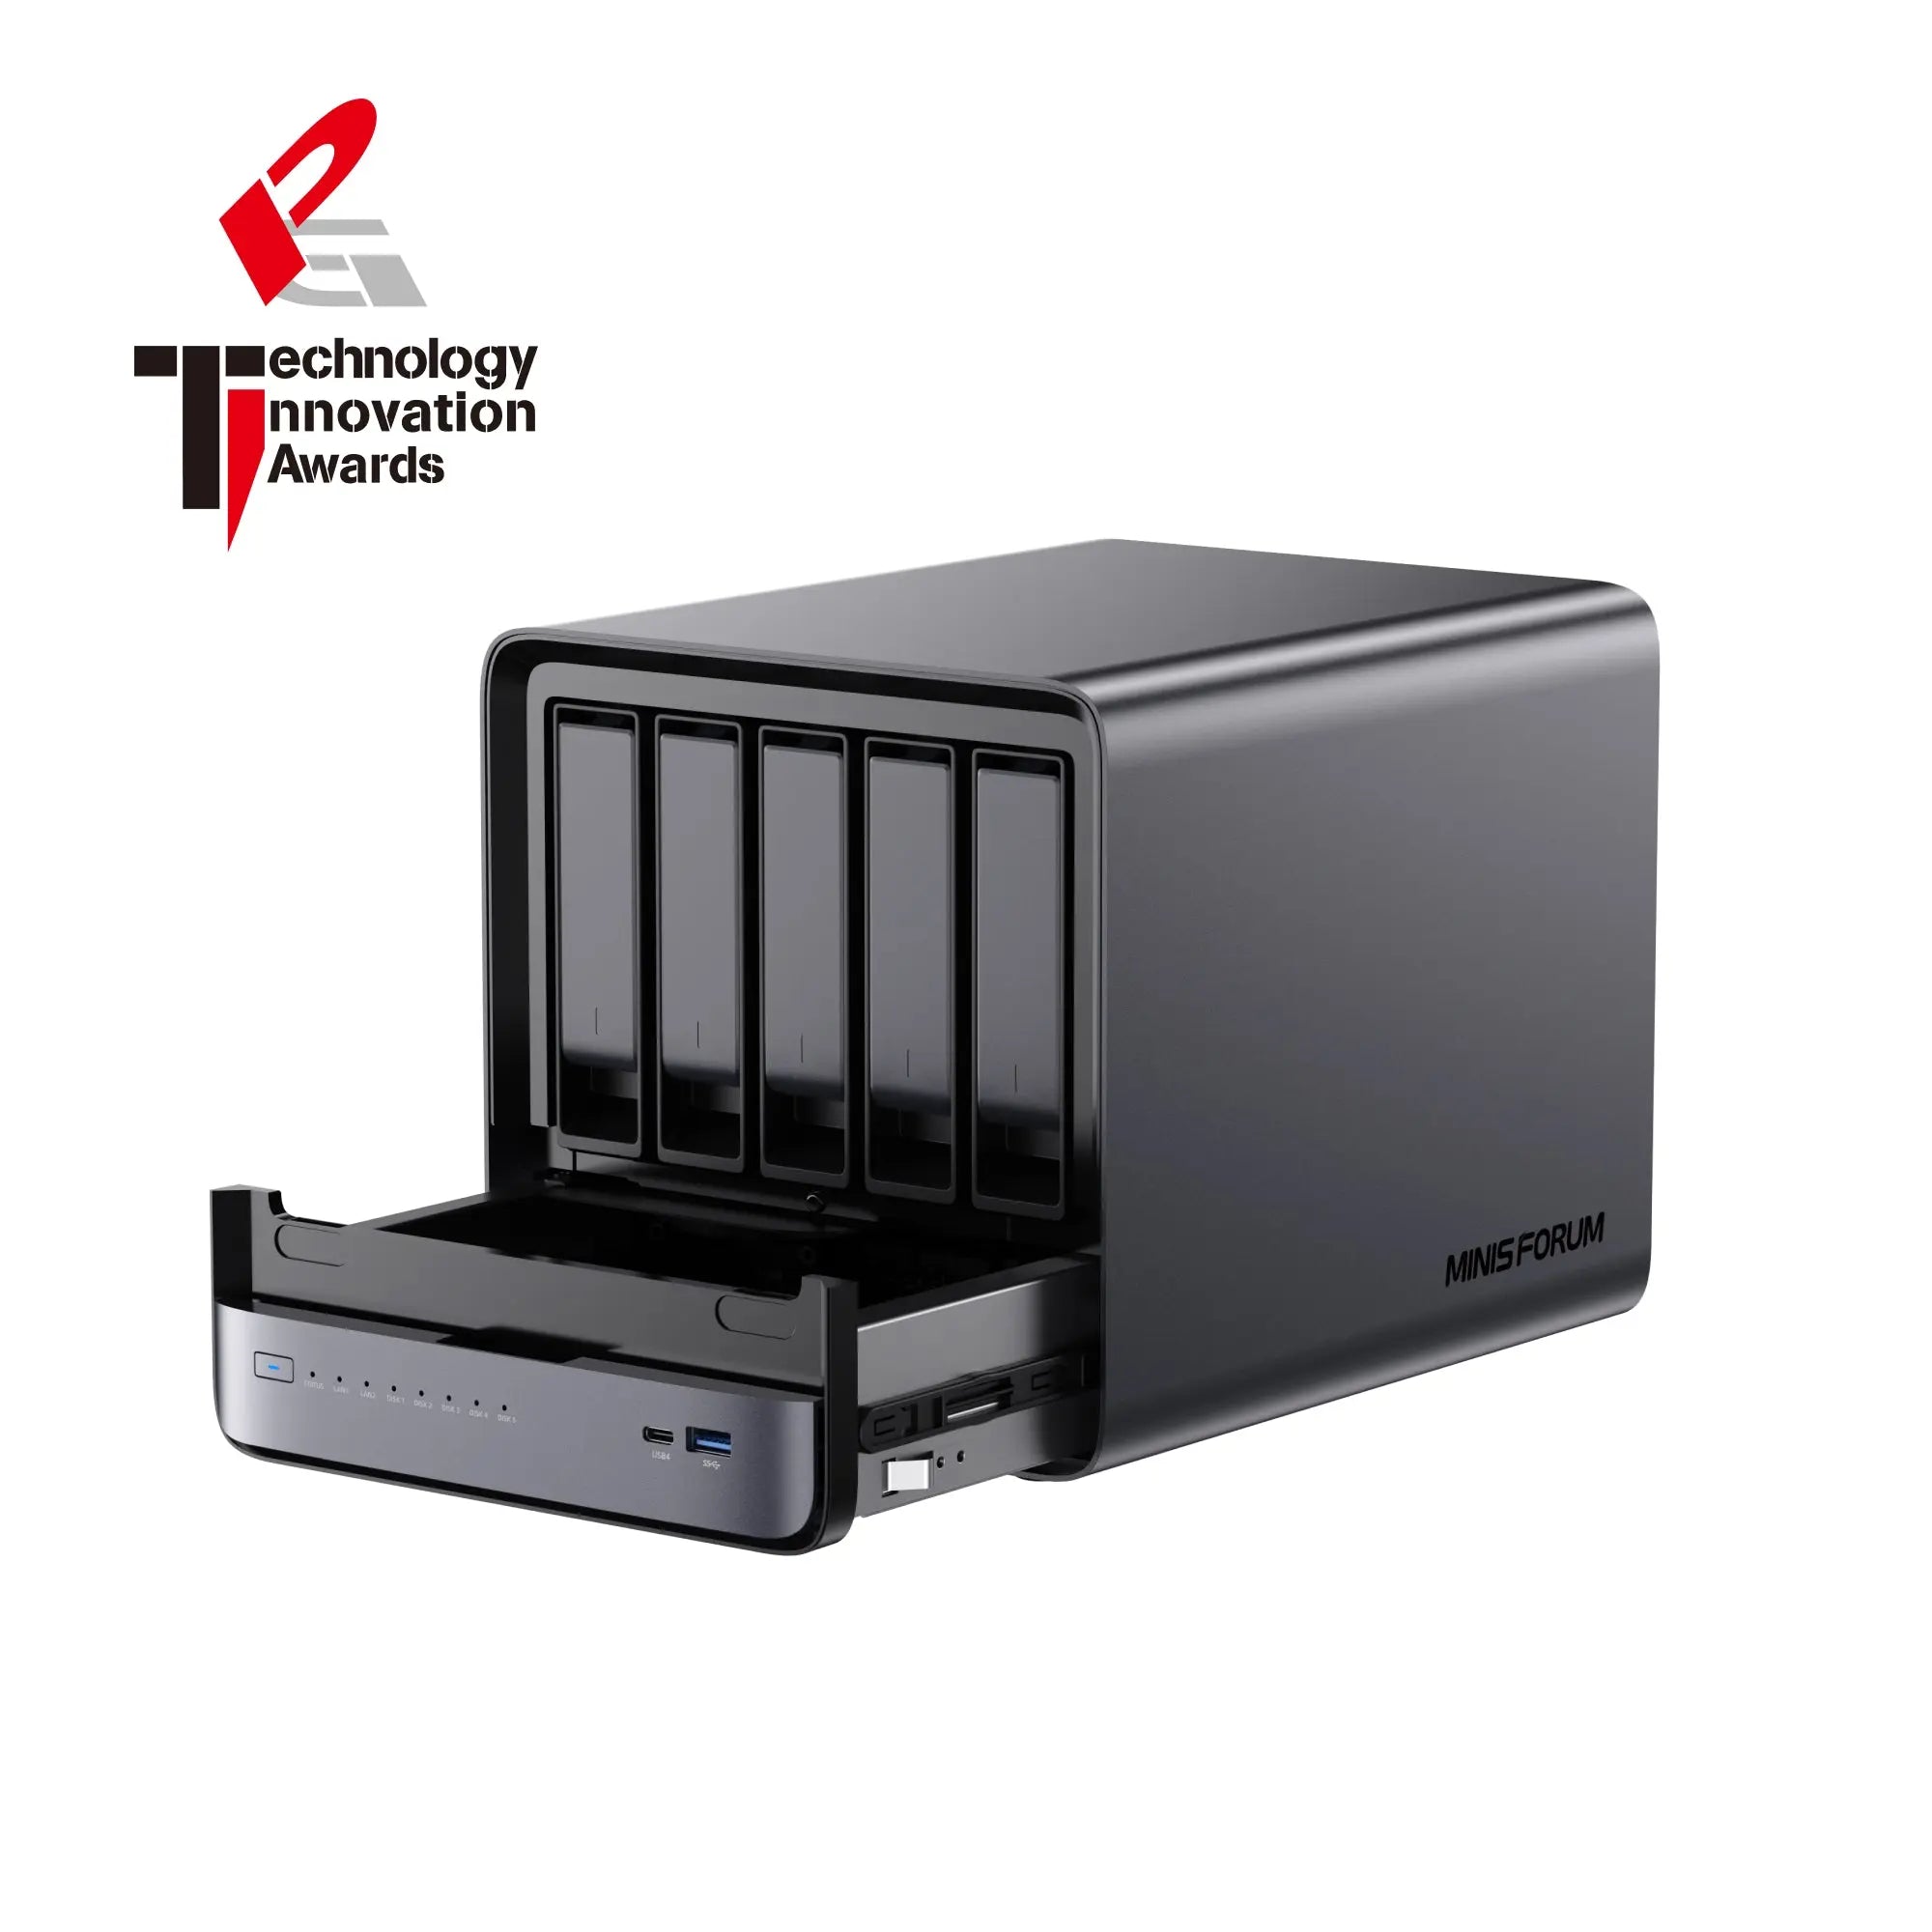
1. Hardware Installation (Memory & HDD)
Refer to the official video below to install Memory and HDD.

2. Power On and Start Up (NAS Device)
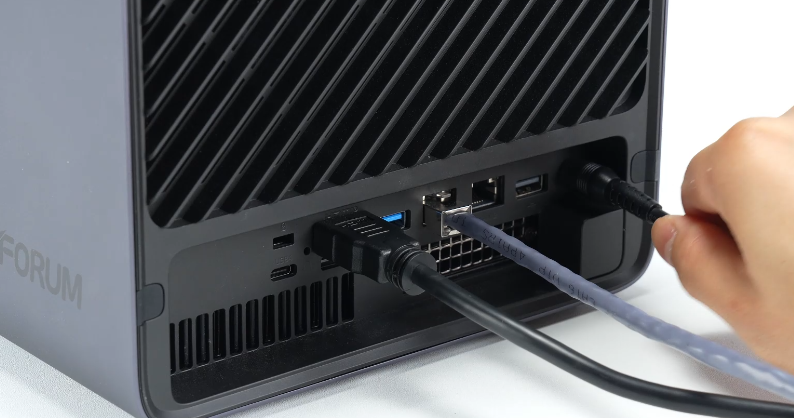
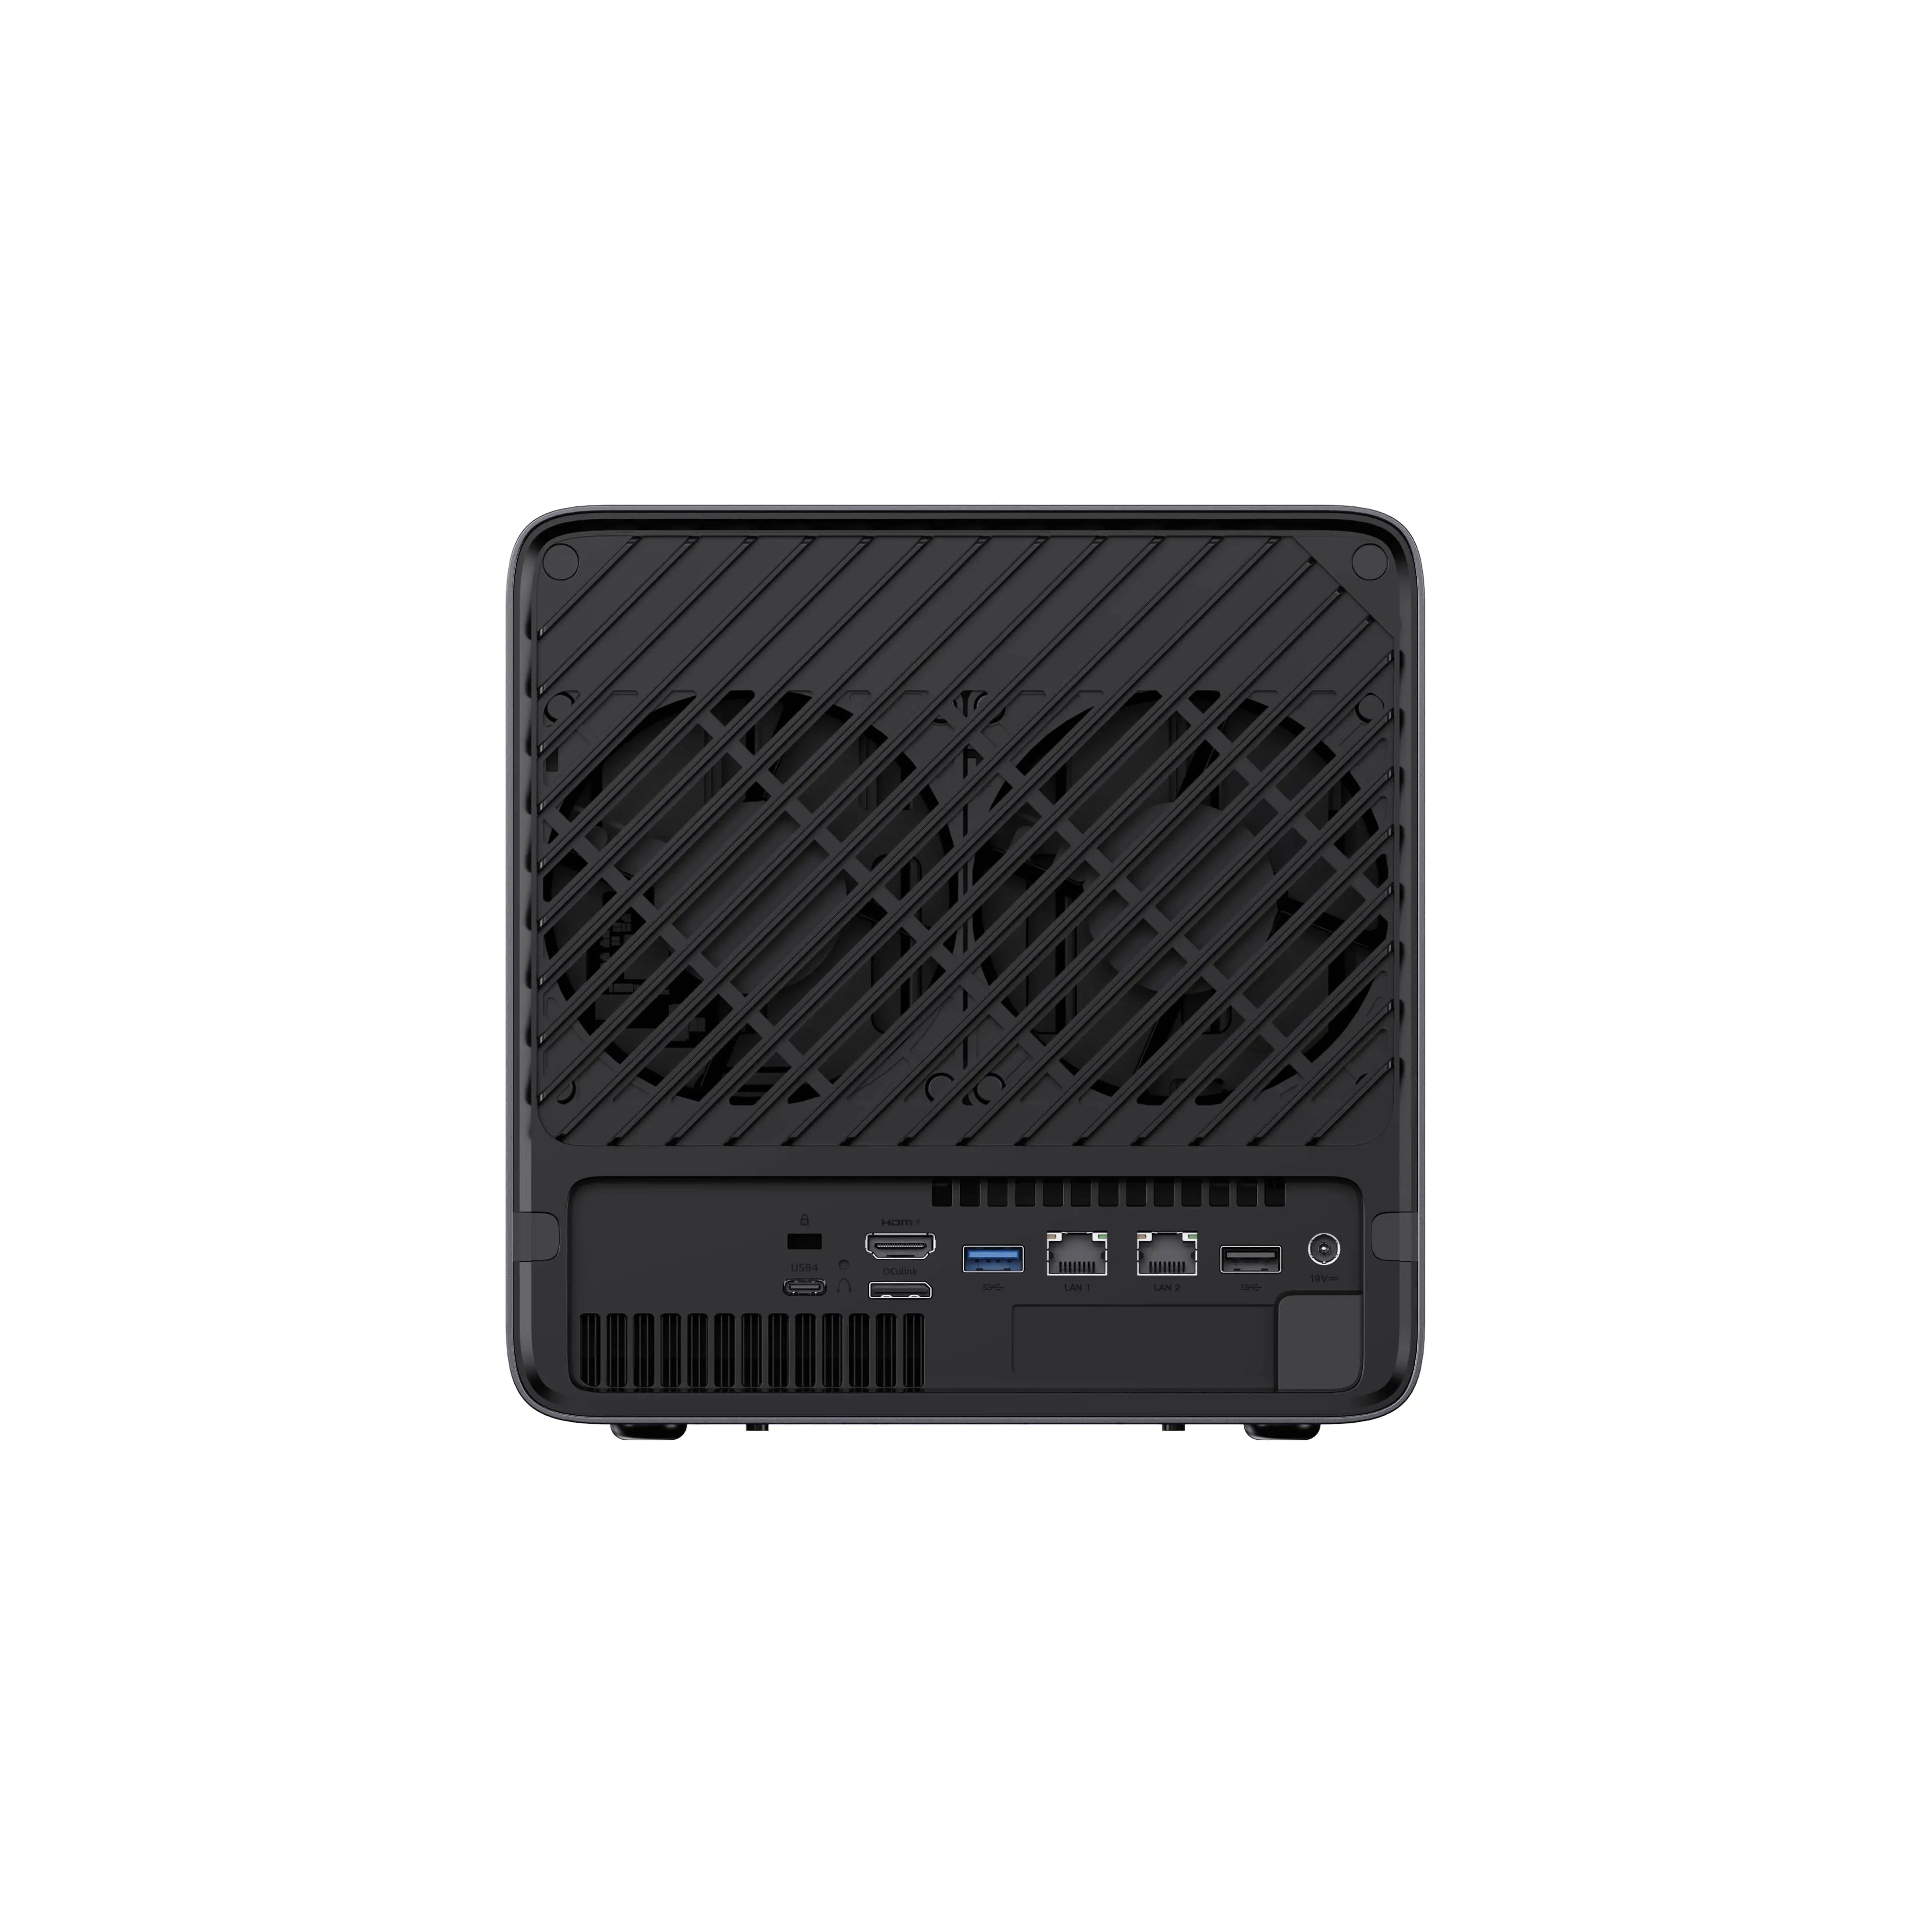
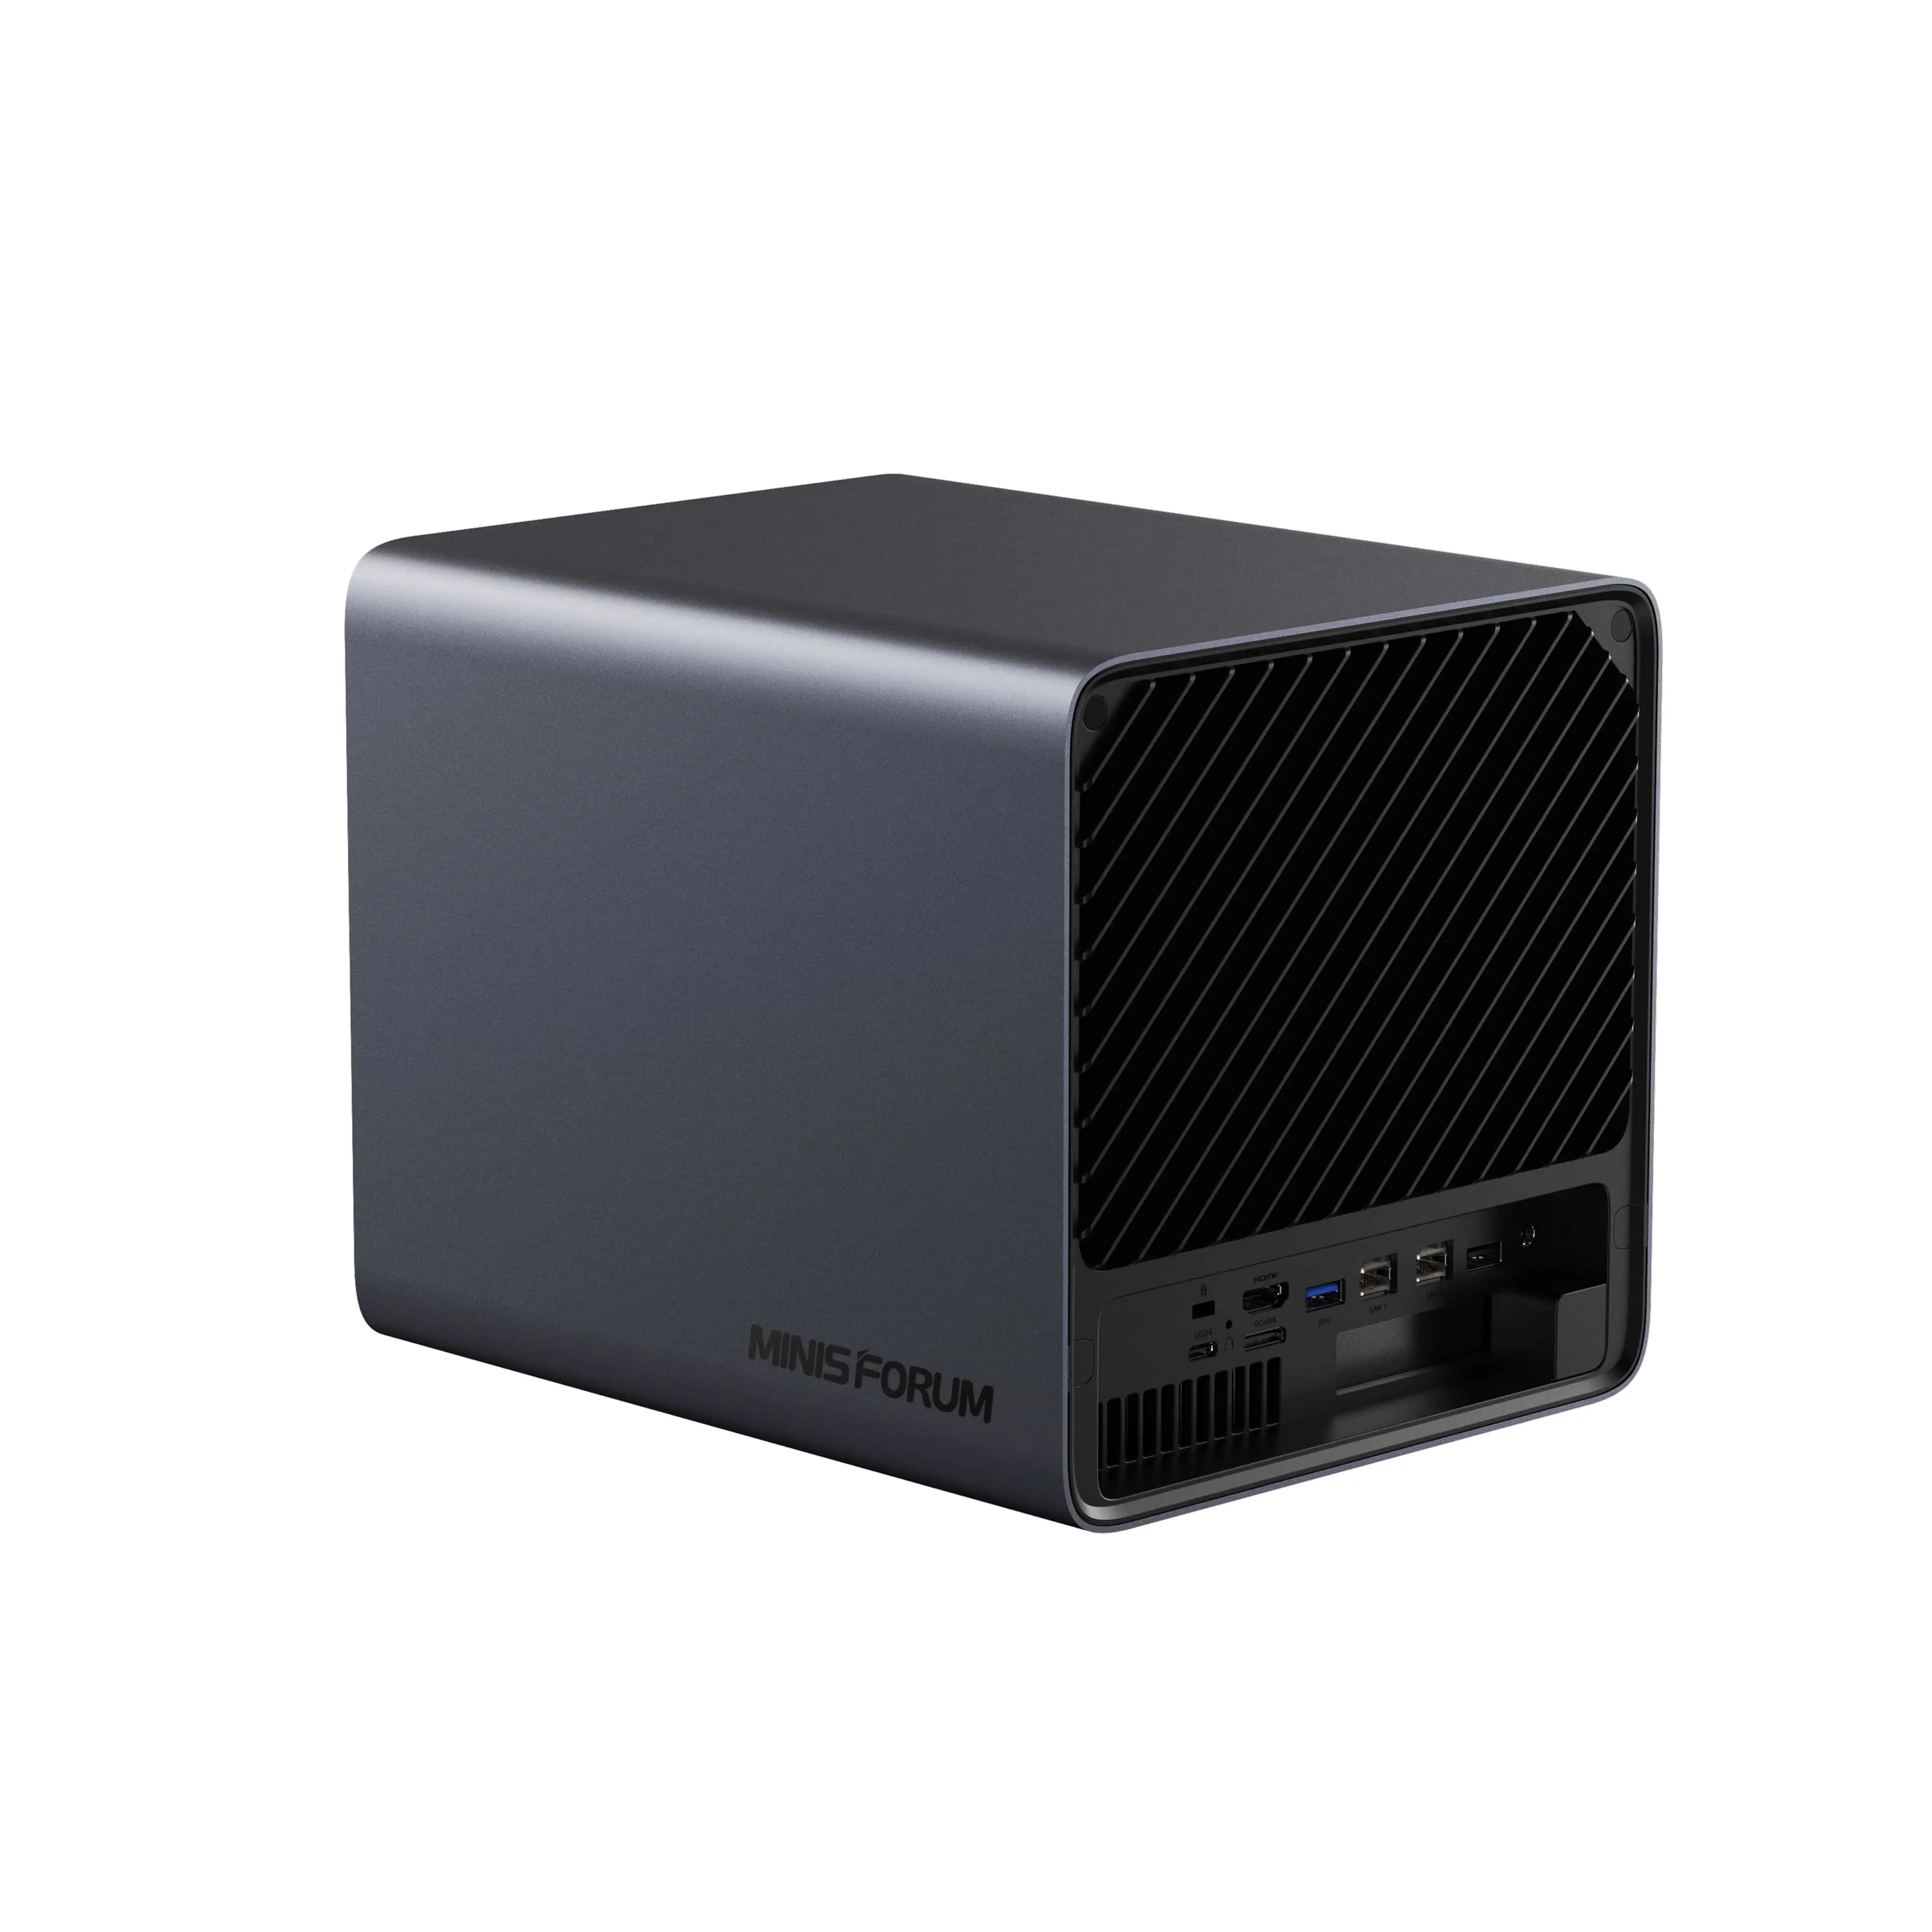
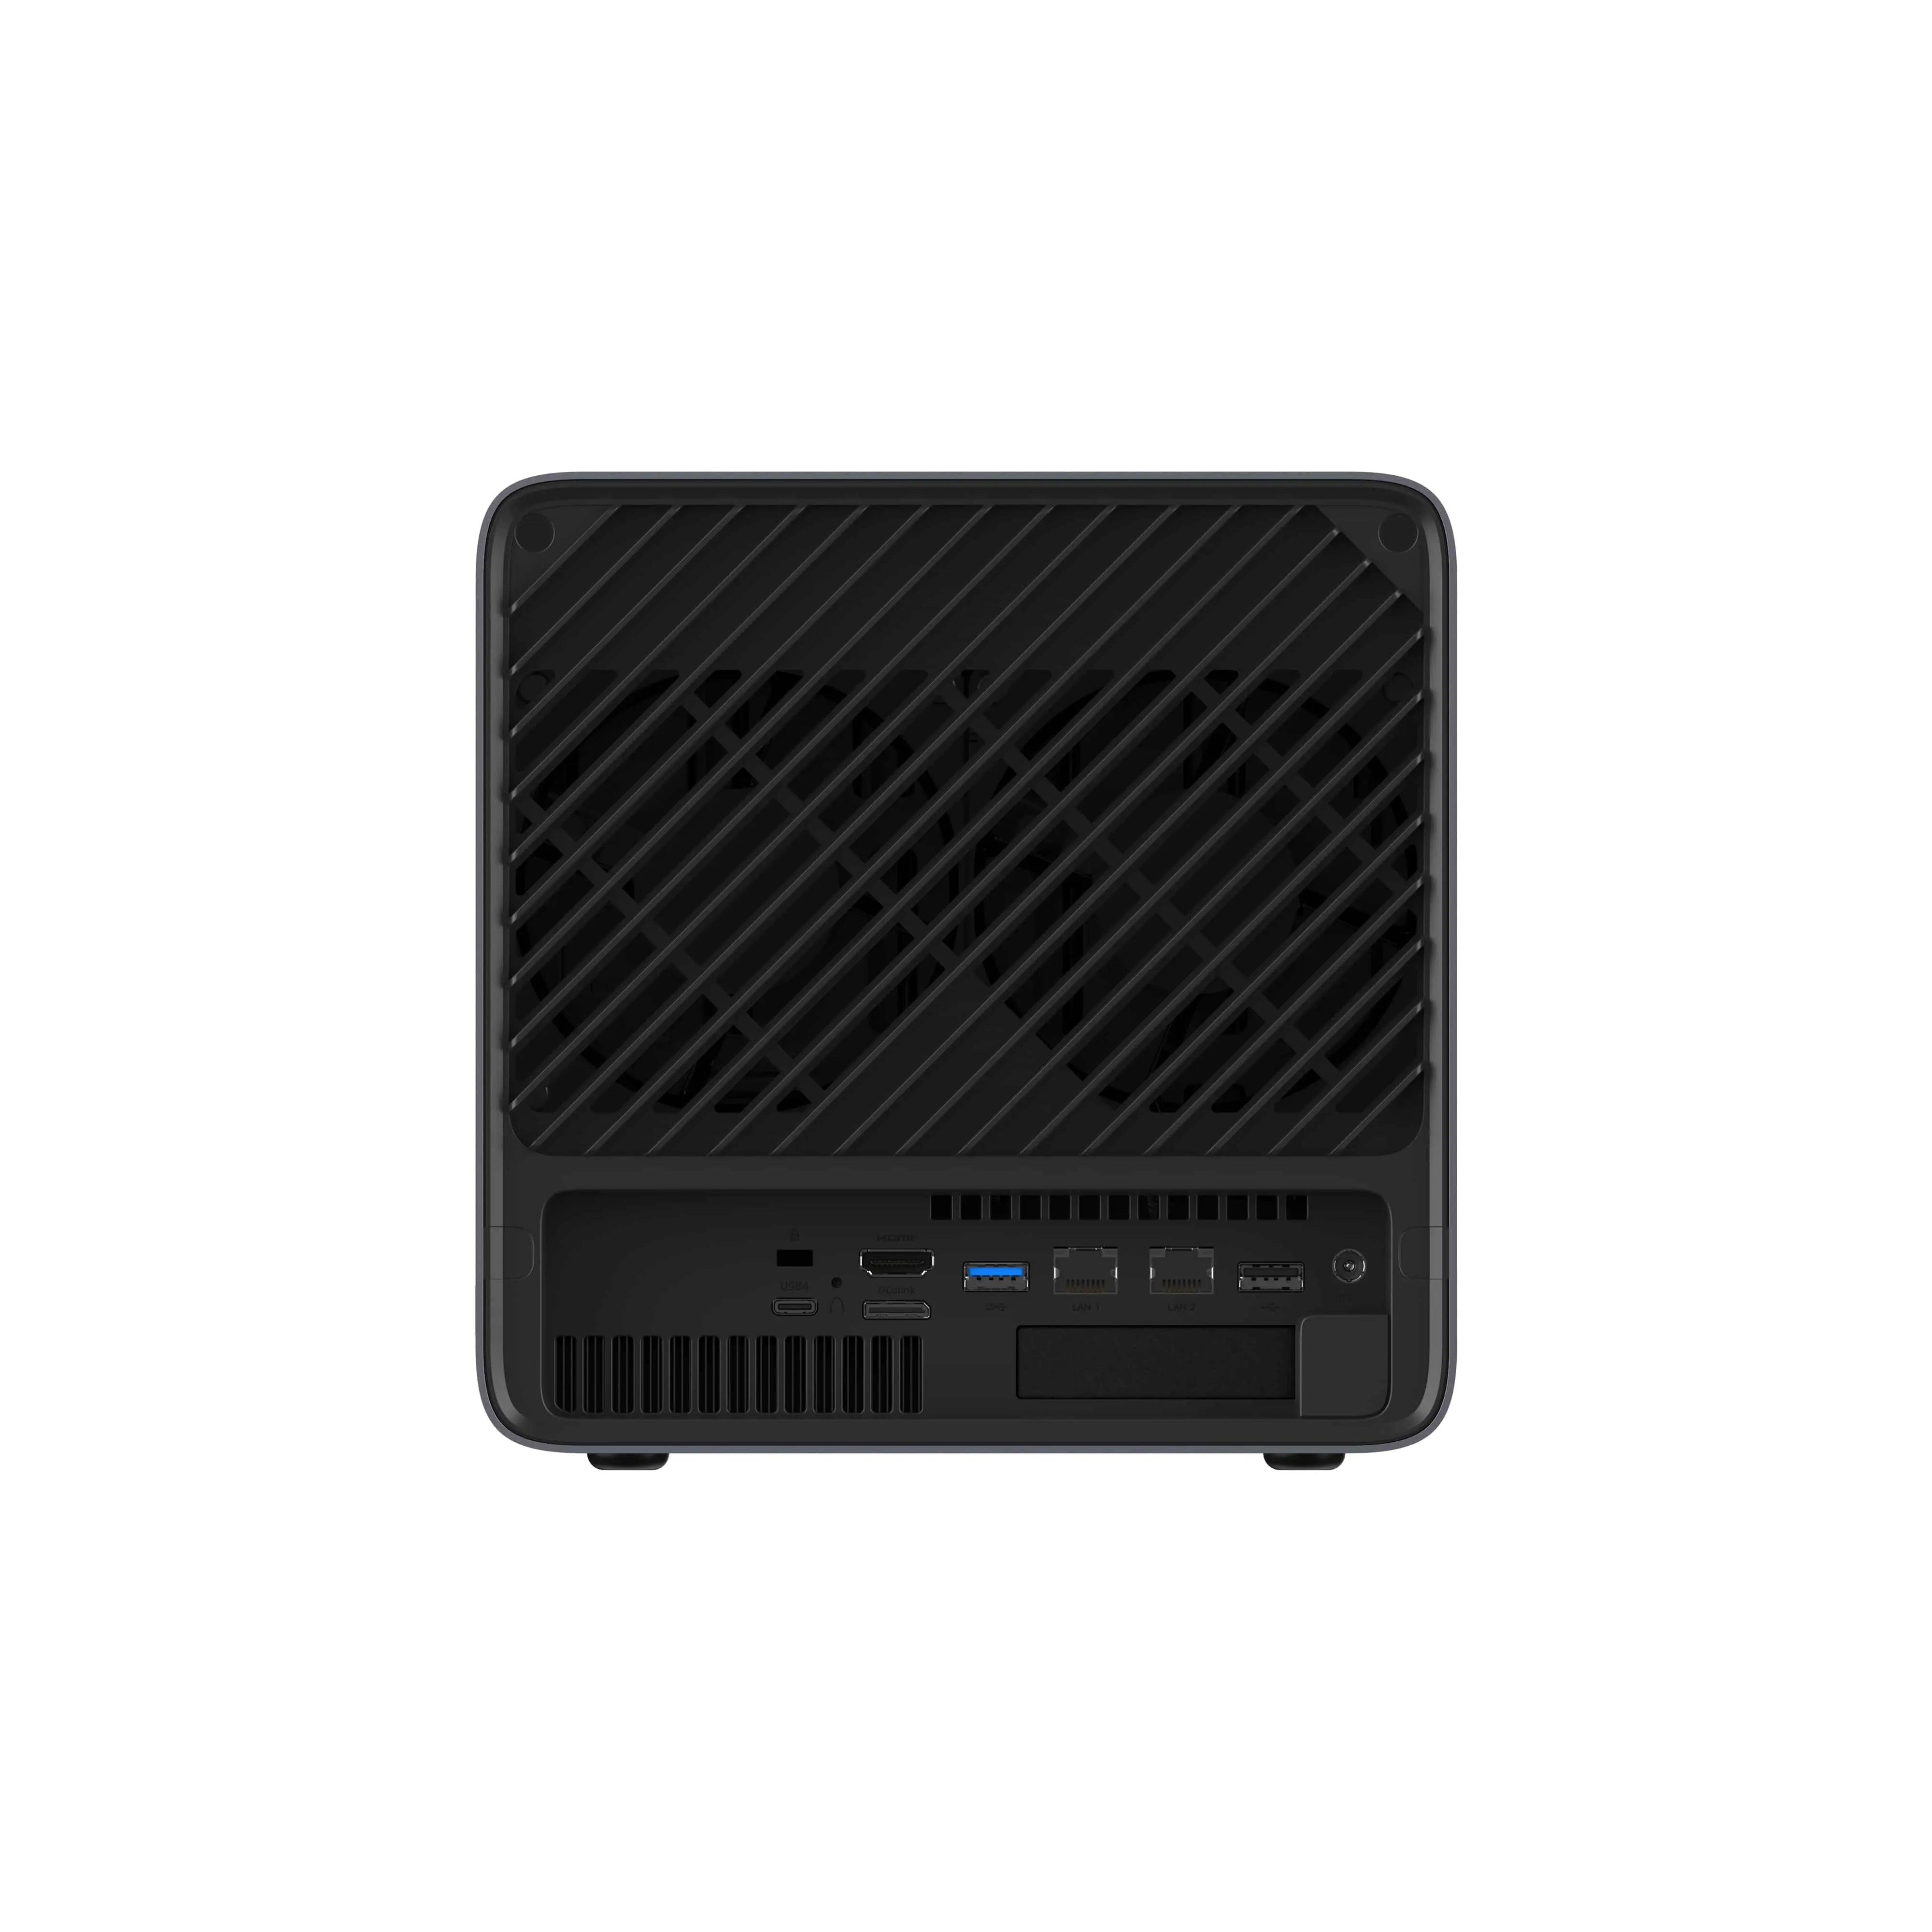
2.1 Connect cables
Plug in the power cord, network cable, and HDMI cable (connected to a monitor).
Please ensure an internet connection is available for first-time setup.
2.2 Press the power button to turn on the device.
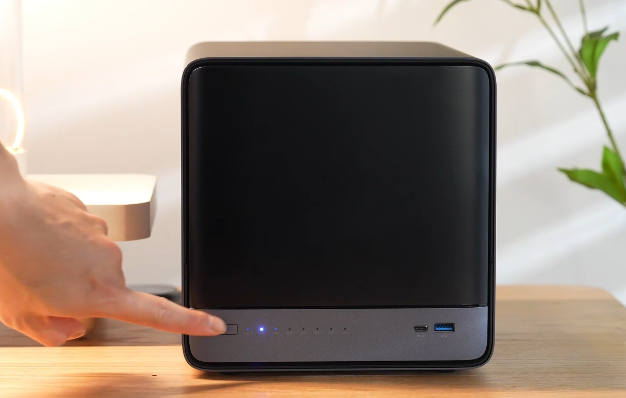
2.3 Wait 3–5 minutes until the monitor displays the LOGO + IP address (successful startup).
Once you see the IP address, the NAS is ready for activation.
3. Activation (Using Another Device)
Note: The NAS does not have a system desktop. To activate it, you will need another device (computer or smartphone).
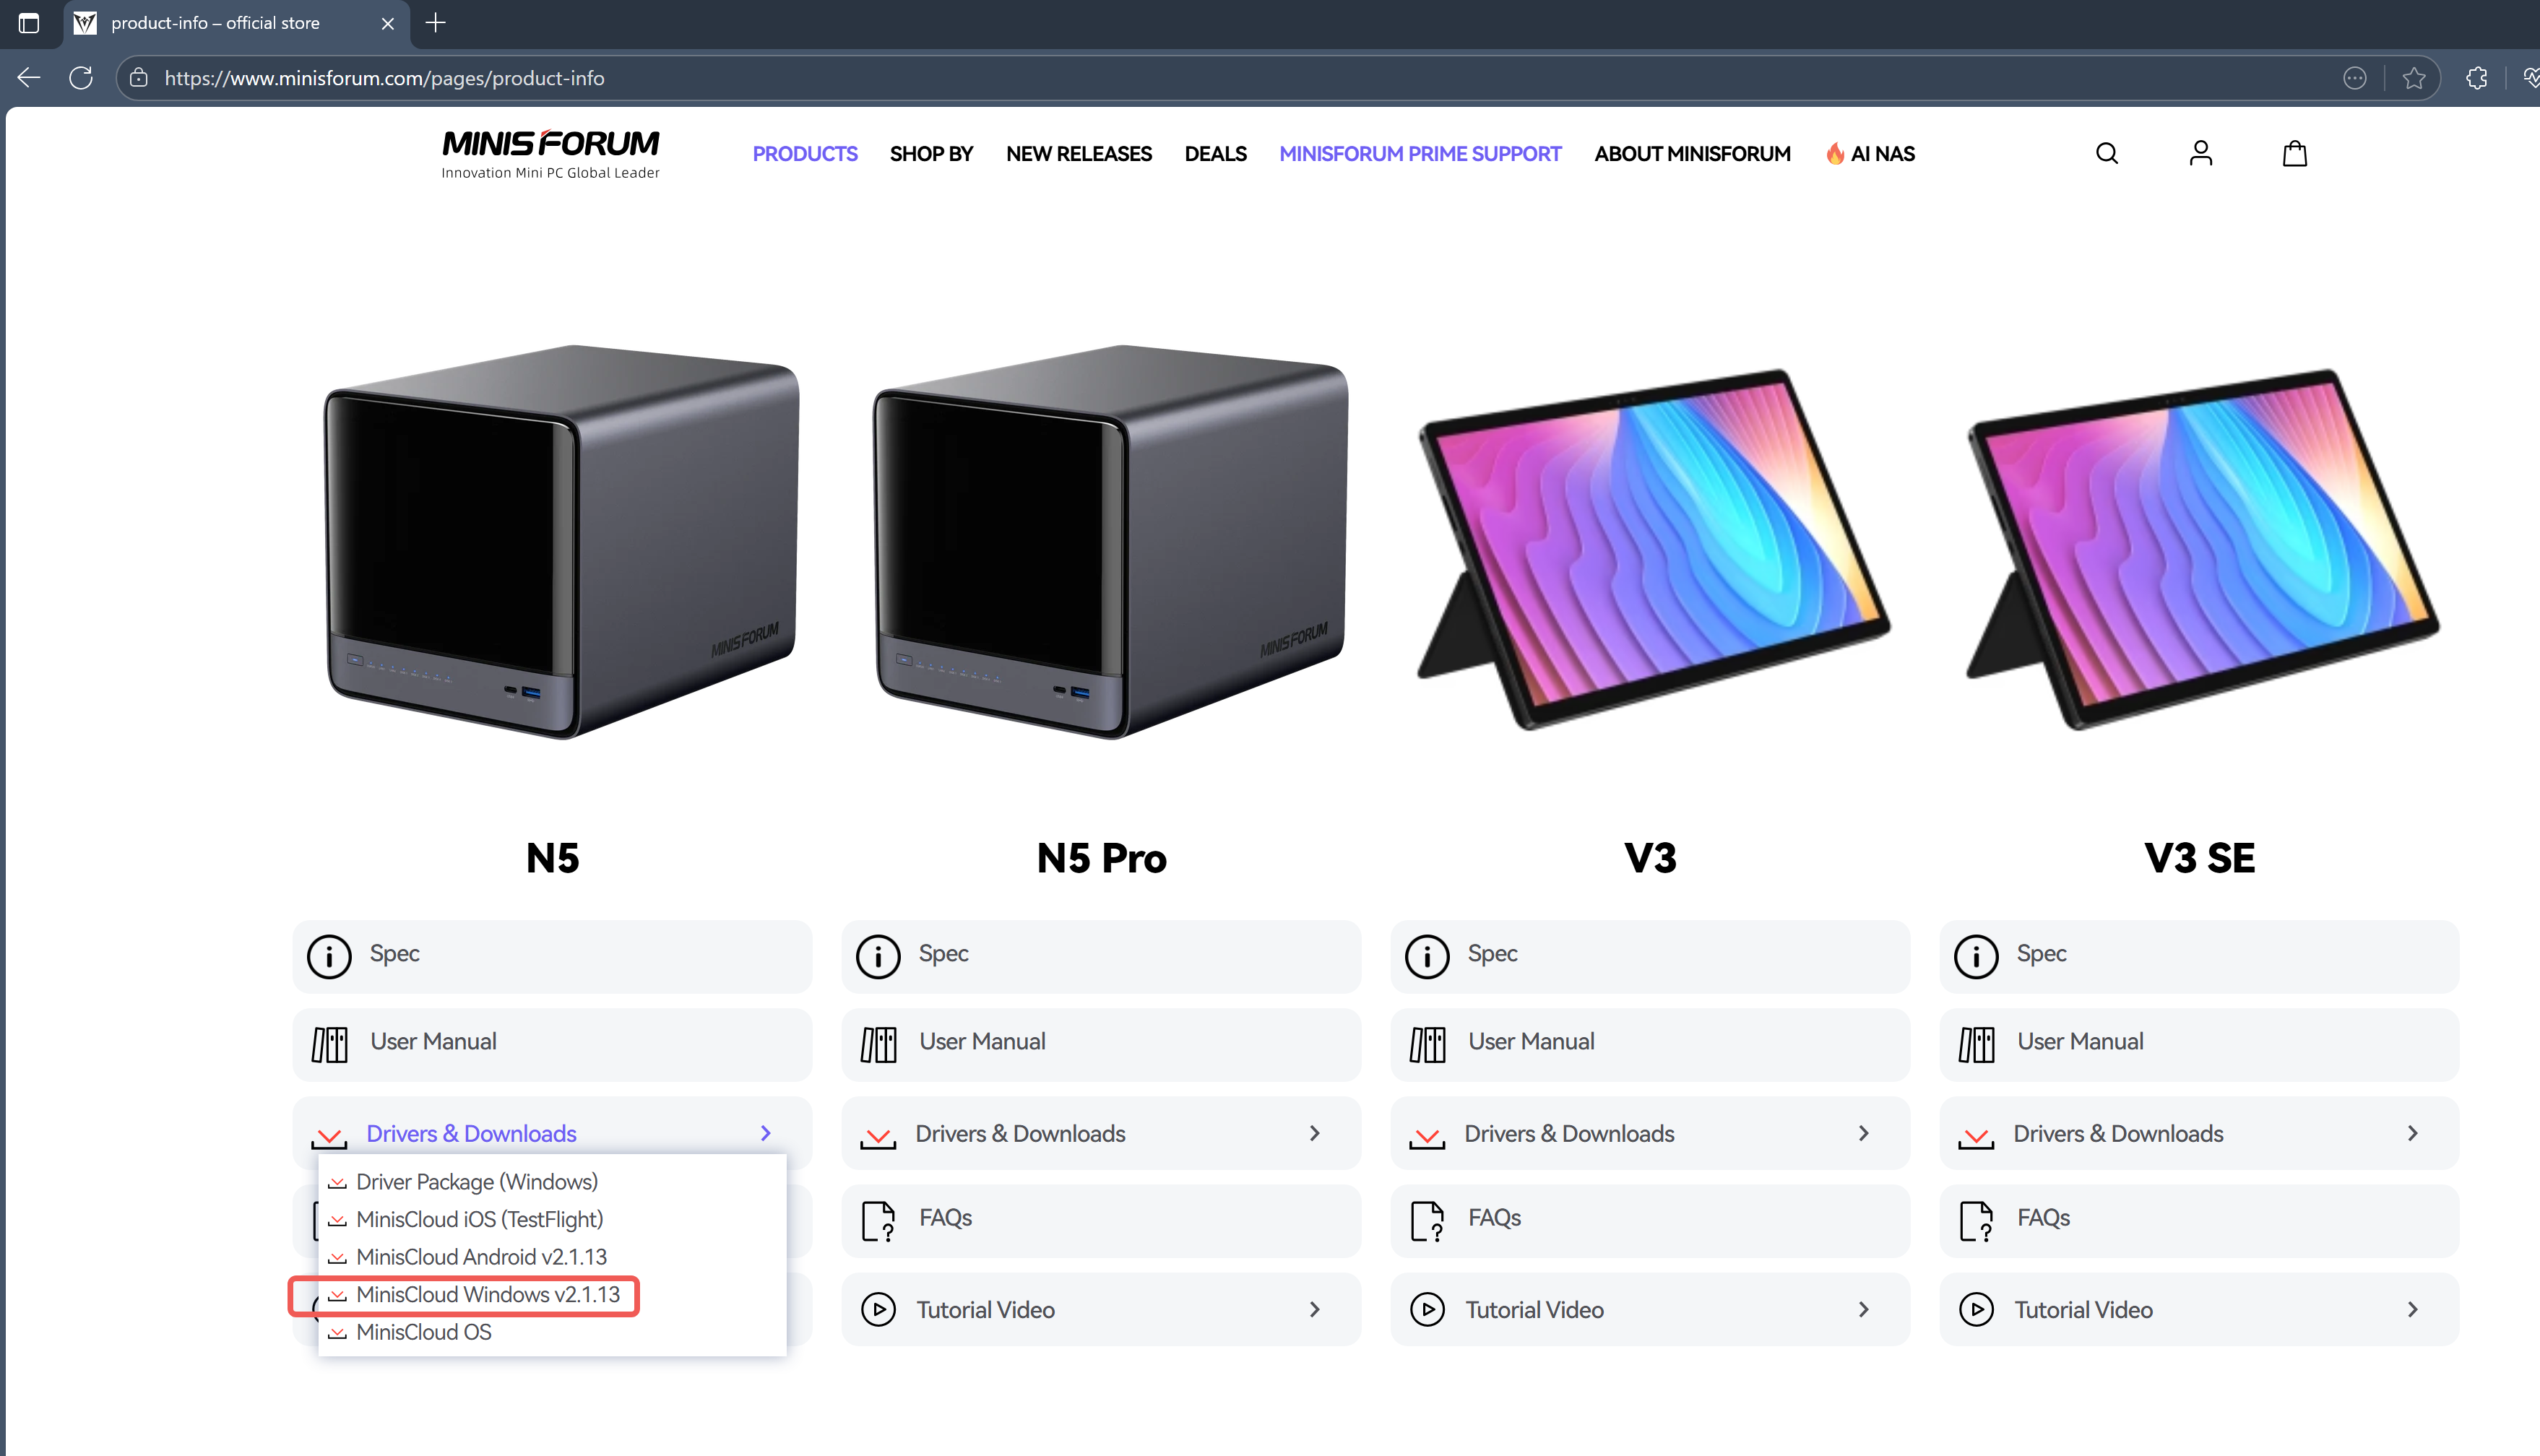
3.1 Install the Client App
Browser Access: http://www.minisforum.com → Top "SUPPORT" → Search for "N5" or "N5 Pro".
Download and install the app for your device. The app supports:
- Windows PC
- Mac
- iPhone / iPad
- Android smartphones / tablets
3.2 Add Your NAS
Make sure your device and the N5 NAS are connected to the same network.
Open the app and follow these steps:
- Tap "Add Device"
- The app will automatically detect N5 NAS on the network.
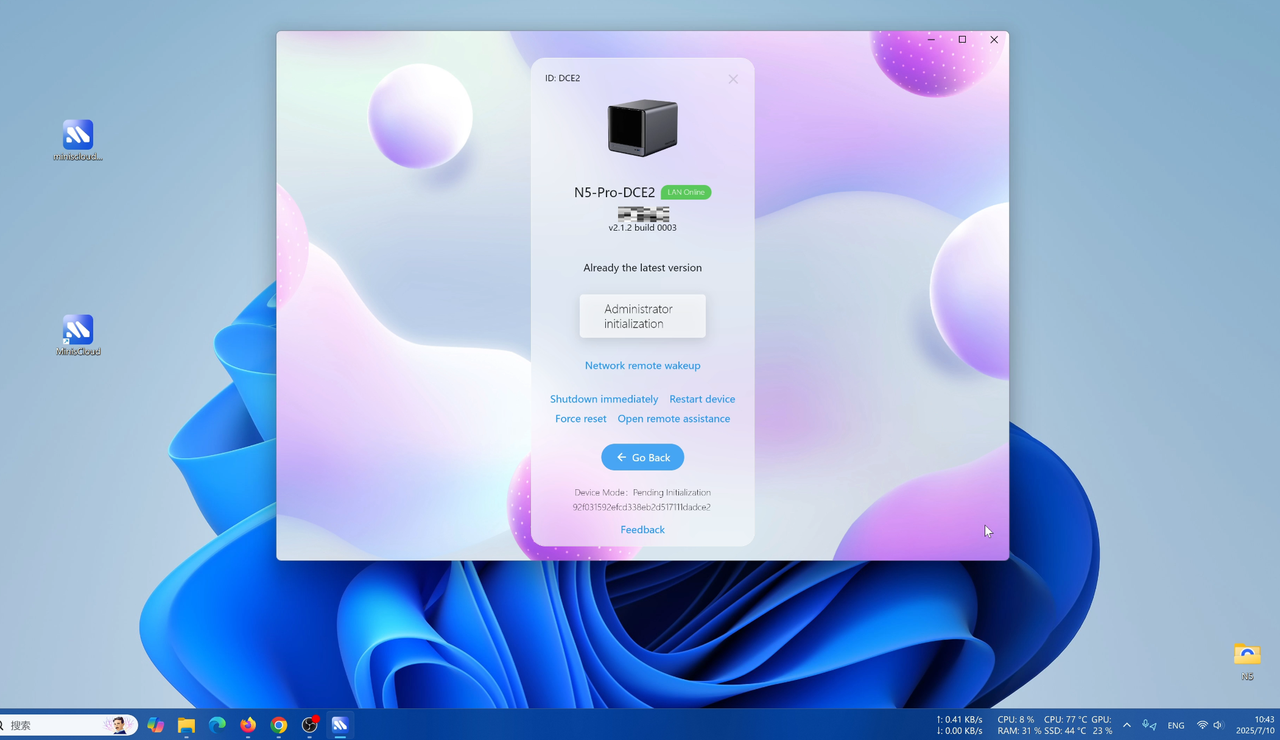
If not detected, you can enter the IP address manually. - Select the detected device and begin the initialization process.

3.3 Administrator Initialization
3.3.1 Register an account
Fill in the username/password (administrator account). Email/phone number is optional.
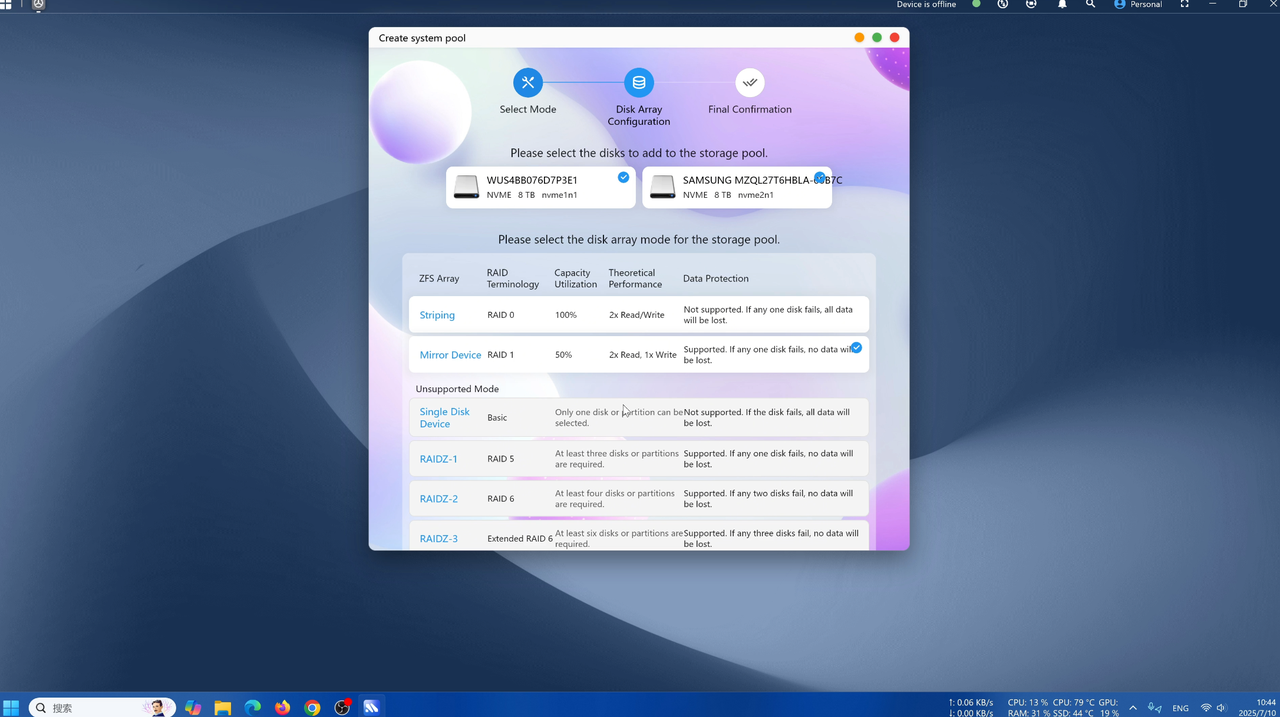
3.3.2 Create a storage pool
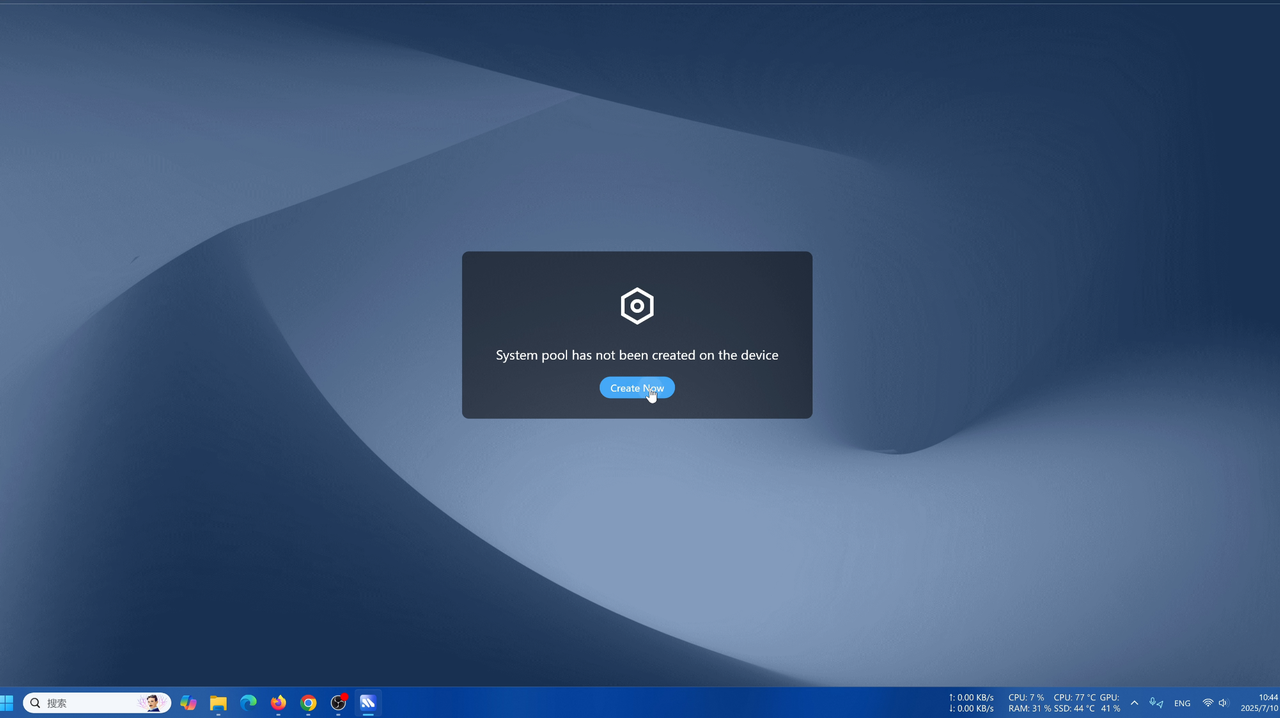
⚠️ Important:
- At least one additional hard drive must be added (excluding the built-in 128GB SSD)
- The operation will format the selected hard drive — double-check your selection!
- Be careful — selecting the wrong disk may result in data loss.
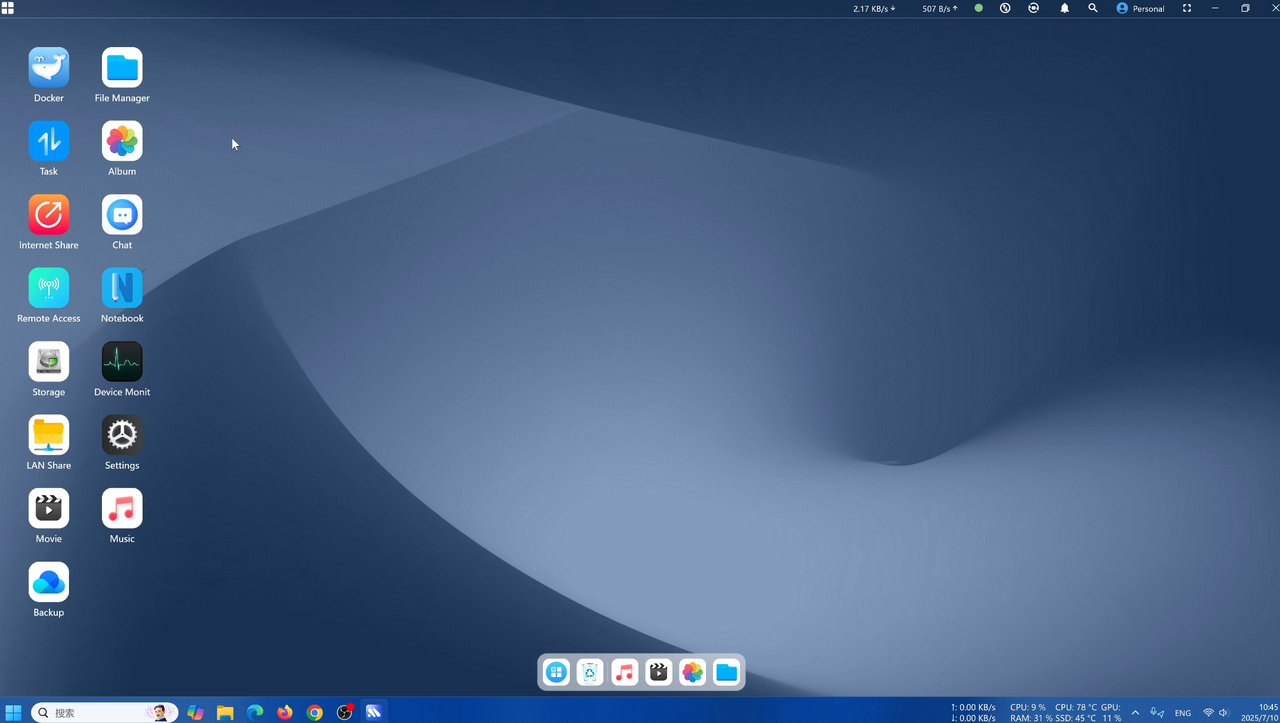
Once the storage pool is successfully created, the system will automatically enter the desktop, and your NAS will be ready for use.
4. Troubleshooting
If the app cannot detect your N5 NAS, check the following:
Network connection
- Is your device connected to the same Wi-Fi network as the N5 NAS?
- If using a wired connection, is the LAN cable securely plugged in?
Firewall settings
- Is your computer’s firewall blocking the app?
- Check your router’s firewall settings.
Power supply (N5 NAS)
- Is the power cable securely connected to the N5 NAS?
- Is the power button on the N5 NAS pressed?
5. Video Tutorial
If you still have questions, watch the official tutorial video:
YouTube: https://youtu.be/dpupD_Ir_Z0
Summary
The MINISFORUM N5 NAS is easy to use, but first-time users may feel a bit confused. Rest assured — stopping at the logo screen is normal. Once you complete the setup using the dedicated app, you can start using it right away.
Ready to Get Your Own N5 NAS?
If you found this guide helpful and are ready to experience the N5 NAS for yourself, you can purchase it here:


Duties Included

Trade-In

30-Days Local Return

Brand Shop Exclusive Benefits
Deliverable Areas

Delivery Timeliness

Repair Services

Insurance Services
Benefits enjoyed by Minisforum customers
Brand Shop Exclusive Benefits
›
- Online Instant Service
- 3-Year Extended Warranty
- Gift Redemption with Points
Can be delivered for free to:
- EU countries: Czech Republic, Denmark, Austria, Belgium, Bulgaria, Croatia, Estonia, Finland, France, Germany, Greece, Ireland, Italy, Latvia, Lithuania, Luxembourg, Netherlands, Poland, Portugal, Romania, Slovakia, Slovenia, Spain, Sweden, Hungary.
- Non-EU countries: Switzerland, Albania, Belarus, North Macedonia, Iceland, Bosnia and Herzegovina, Vatican City, Liechtenstein, Monaco, Norway, San Marino.
Delivery Timeliness
›
- DE Warehouse: 5-7 business days
- Hong Kong Warehouse: 7-10 business days
- Refurbished Devices: 5-7 business days
- Pre-sale Products: 5-7 business days after warehouse arrival
Repair Services
›
Provides free repair and after-sales services for products that are within the warranty period. For more details, please contact the customer service team.
Insurance Services
›
Minisforum provides two types of protection for sold products:
- 1. Shipping Protection includes: Loss and damage in transit, Theft/Porch Piracy, Mis-delivery by courier, USD$5 compensation for delay Smooth Claims
- 2. Product Protection Plan:Customers can choose a 1-year, 2-year, or 3-year insurance plan tailored to their needs. This plan covers accidental damage occurring during normal product use and extends the original manufacturer's warranty with identical coverage terms after its expiration. Different durations are subject to varying premium rates.

Payment Methods

Trusted Delivery
